The TypeScript vibe coding meta

Every day, my curiosity and skepticism about gen AI for coding are at odds. Let me explain how this led me to inventing the TypeScript vibe coding meta.
On my bad days, I look at an LLM’s output and think: this is nonsense. I’ve spent years acquiring the skill to write reliable, maintainable code. No autocomplete is going to outwork blood, sweat, tears and coffee. So when an LLM dumps 500 lines of brittle, context-free spaghetti into my editor, I just feel like giving up.
And yet… the other half of me can’t ignore what’s happening. Once the frustration simmers down, there are moments where AI completions and conversations genuinely do feel good.
A while ago, I read this article by Geoffrey Huntly (I highly recommend his blog in general), which highlights that vibe coding is about designing the right guardrails so the vibes can actually become something real.
Today I want to extend on that idea by showing you how to design the right guardrails for your AI assistant to write TypeScript code for you.
Vibe (check) coding
Let’s address an actually good, responsible way to “vibe code” as a seasoned software developer. You will find out that it does not involve a lot of vibing at all. At least not in the way as described by Andrej Karpathy, who originally coined the term.
I will be showing you how to effectively let a gen AI model write code for you, in TypeScript, without losing confidence in your code. You can follow along as I set up a new project with TypeScript, Deno and Claude Code.
Using Deno and Claude Code is just my personal preference. It should be fairly straight forward to follow along with your own preferred tech stack and tooling; wether it’s Cursor, Windsurf or other integrated coding assistants.
Rules rule

The importance of writing rules for your assistant CANNOT be overstated. You should ALWAYS have clear, concrete rules on (but NOT limited to) these general categories:
- Describing the general project architecture
- Language, runtime and frameworks
- Code validation
- Git conventions
- Specs
- Writing more rules 🧐
You will let the assistant write these for you. What works for me is discussing all of these “Q&A” style; let the assistant ask a question and wait for your answer. Repeat until enough information is gathered.
I’m using Deno, so I deno init , set up some basic directory structure, then run claude and execute the /init command which initializes a new CLAUDE.md file in my project, which contains a rough initial outline of the project’s properties. Alternatively, you can ask your AI assistant in e.g. Cursor or Windsurf to do the same for you.
You can immediately define this “meta rule” somewhere at the bottom of your rules file for Q&A style conversations:
Prompt example## Meta Rules
- Always discuss new rules and rule changes in Q&A style. Ask a question and await the answer before asking the next question, until sufficient information is provided.Then start your first Q&A session…
Prompt exampleLet's establish clear rules for how you should behave when writing code. We should discuss coding standards, patterns, preferences, and use that to build comprehensive rules.Continue to have more Q&A sessions for every before mentioned category until you are satisfied with the output. You should end up with something like as follows; probably more extensive depending on your project needs or your teams common practices, devops, etc…
Output example for general project rules# CLAUDE.md
This file provides guidance to Claude Code (claude.ai/code) when working with code in this repository.
## Project Overview
This is a Deno TypeScript project - a modern JavaScript/TypeScript runtime alternative to Node.js. Deno executes TypeScript directly without requiring a build step.
## Key Commands
### Development
- `deno task dev` - Run the main application with file watching for auto-reload
- `deno run main.ts` - Run the main application once
### Testing
- `deno test` - Run all tests in the project
- `deno test main_test.ts` - Run tests for a specific file
- `deno test --watch` - Run tests with file watching
### Code Quality
- `deno fmt` - Format all TypeScript files according to Deno's default style
- `deno lint` - Lint all TypeScript files for common issues
- `deno check main.ts` - Type-check without running the code
<OwowShoutout />
## Architecture
The project follows Deno's module-based architecture:
- **Module Exports**: Functions are exported directly from `.ts` files
- **Testing Pattern**: Test files use `_test.ts` suffix and import the module being tested
- **Entry Point**: `main.ts` uses `import.meta.main` to determine if it's being run directly vs imported
- **Dependencies**: Managed through JSR imports in `deno.json`, or with npm:prefix when using npm packages
## Deno-Specific Considerations
1. **No node_modules**: Dependencies are cached globally, not in the project directory
2. **Direct TypeScript execution**: No compilation step or dist/ folder
3. **Import syntax**: Use explicit file extensions (`.ts`) in imports
4. **Standard library**: Import from `jsr:@std/` for Deno standard library modules
5. **Permissions**: Deno requires explicit permissions for file system, network, and environment accessDon’t worry: if you forgot to put something in your rules, or later your assistant forgets or skips something, simply tell it to write new rules. You are never done writing rules. You will be writing a LOT of rules. Thousands of lines of rules.
- Installed a new library package? New rules!
- Introducing a new pattern? New rules.
- AI assistant done goofed? More rules, and make it swear it never goofs again.
Thou. Shalt. Be. Disciplined. In. Writing. Rules.
Though, over time you will find yourself writing fewer rules as your assistants behaviour improves.
Tip: Use # to memorize shortcut to quickly add rules to CLAUDE.md
Specifications
We are going to create spec (specification) files for every single feature or domain in your project. Spec files are great for both humans and robots! A spec file typically contains a feature overview, purpose and a list of acceptance criteria and/or requirements, in addition to more technical details like dependencies or constraints.
You should start every coding session with an extensive conversation on what should be built, and write the outcome to a specs.md file.
Prompt exampleCreate rules for specification files:
- Every feature must have a specs.md file in its module directory
- Every planning session should start with an extensive discussion about fature specifications
Specs must include
- Feature overview and purpose
- Detailed acceptance criteria
Specs could include
- Technical requirements and constraints
- Dependencies and integrations
- Expected behavior and edge casesTurning specs into typed api surface
Next, you will be instructing your AI assistant on writing mocks for your feature, based on the specs, using TypeScripts type system. No implementation code; just API surface.
In TypeScript, the declare keyword informs the compiler that a specific identifier exists and can be used in the code. We can use this to our advantage because it allows the assistant to write a substantial amount of functions, classes, methods or shared values and validate those with real tests, without having to build implementation and tests simultaneously. It provides one extra layer of protection against hallucinations and complements the specs files.
/**
 * Shared constants
 */
declare const REQUEST_TIMEOUT_MS: number;
declare const ENVIRONMENT: 'development' | 'production';

declare function makeRequest<T>(url: string, options: RequestOptions): Promise<T>;

declare class RequestOptions {
  timeout?: number;
  headers?: Record<string, string>;
  body?: any;
  method?: 'GET' | 'POST' | 'PUT' | 'DELETE';
  queryParams?: Record<string, string>;
}

declare class HttpClient<Model extends Record<string, unknown>> {
  get(url: string, options?: RequestOptions): Promise<T>;
  post(url: string, options?: RequestOptions): Promise<T>;
  put(url: string, options?: RequestOptions): Promise<T>;
  delete(url: string, options?: RequestOptions): Promise<boolean>;
}

declare const userClient: HttpClient<{ id?: string | null; email?: string | null }>;
You already know what that means: More rules!
Prompt exampleAdd rules for feature development that enforces a "mock first, implement later" approach:
Use the type system to mock API surfaces
- Before any implementation, create comprehensive mocks using TypeScript's type system and `declare` keyword
- Define the complete API surface with classes and their methods, function signatures, constants and variables, exports and other type definitions
Mock validation
- Review mocks to ensure they match specifications
- Verify type definitions are complete and accurateTest-driven
With specs and mocks in place, we should let the AI assistant write tests so it can continuously validate its own work by running the test suite.
Prompt exampleAdd rules for test driven development
- Write thorough tests against the api surface and specifications in colocated specs.md files
- Cover both happy and error paths
- Include edge cases defined in specifications
When writing tests, consider:
- naming conventions for test files and cases
- Required test coverage thresholds
- Mocking and stubbing guidelines
- Test environment setup
- Error case coverageWhen you finished the last Q&A session on test-driven development, we are almost ready to start building. Before you continue, feed your assistant one more prompt to set up rules in regards to implementation.
Prompt exampleAdd rules for feature implementation code
- Only begin actual implementation after mocks and tests are complete
- Replace type-system level mocks like `declare` statements with real code
- Ensure implementation matches mock signatures exactly
- Ensure implementation matches colocated specs.md filesFor your convenience, I uploaded my example CLAUDE.md rules to Github. Having finished all Q&A sessions to set up an extensive framework of rules, you should end up with a rules document similar to mine.
The behaviour loop
You can clear your assistant’s context or start a new chat, and begin feature development by discussing the feature you intend to build.
As mentioned before: Every coding session should start with an extensive discussion on what to build and consequently a specs.md file should be generated. Then, a mock version should be drafted using TypeScripts type system. Tests will be written based on the specifications and tests, and finally implementation code is generated on top of it all. Your AI assistant collaboration should materialise the following behaviour loop:
- Discuss feature specifications
- Write specification (
specs.md). - Mock API/feature surface using TypeScript’s
declarekeyword. - Write tests based on specs and mocks.
- Replace mocks with actual implementation.
- Validate code → build, fix → Validate → build, fix → iterate ad infinitum until all validations pass
Code quality assurance
To reiterate: In this project, every substantial change made to the codebase is automatically verified by your AI assistant. This includes:
- Type Checking: Ensuring that the code adheres to type constraints using tools like
deno check. - Formatting: Applying consistent code formatting to maintain readability and style.
- Linting: Running linting tools to catch potential errors and enforce coding standards.
- Testing: Executing tests to verify that the code behaves as expected.
This automated process helps maintain high code quality and reduces the likelihood of introducing errors.
Summary
If you followed all steps, you should now be able to provide your AI assistant with input for a new feature. It should follow the rules and guide you through defining specs, writing api surface and tests. Once that is done, the real good part begins. Kick it off with whatever “accept all changes” feature your IDE or assistant has available. Sit back and watch the LLM code for tens of minutes until it delivered all requirements!
Go grab a coffee, chat with a colleague, or just enjoy the silence. You could even spin up extra Claude instances and work on multiple features in parallel, using git worktrees.
I invite you to check out some example results in the repository I set up for this article, or even clone the repo and try it for yourself. Alternatively, here are some screenshots of Claude at work, with the instruction to build a FRP stream object:
Prompt exampleLet's start building a new feature. My app requires functional reactive programming with streams. We will start by building a rich Stream object that features transformations and back pressure.


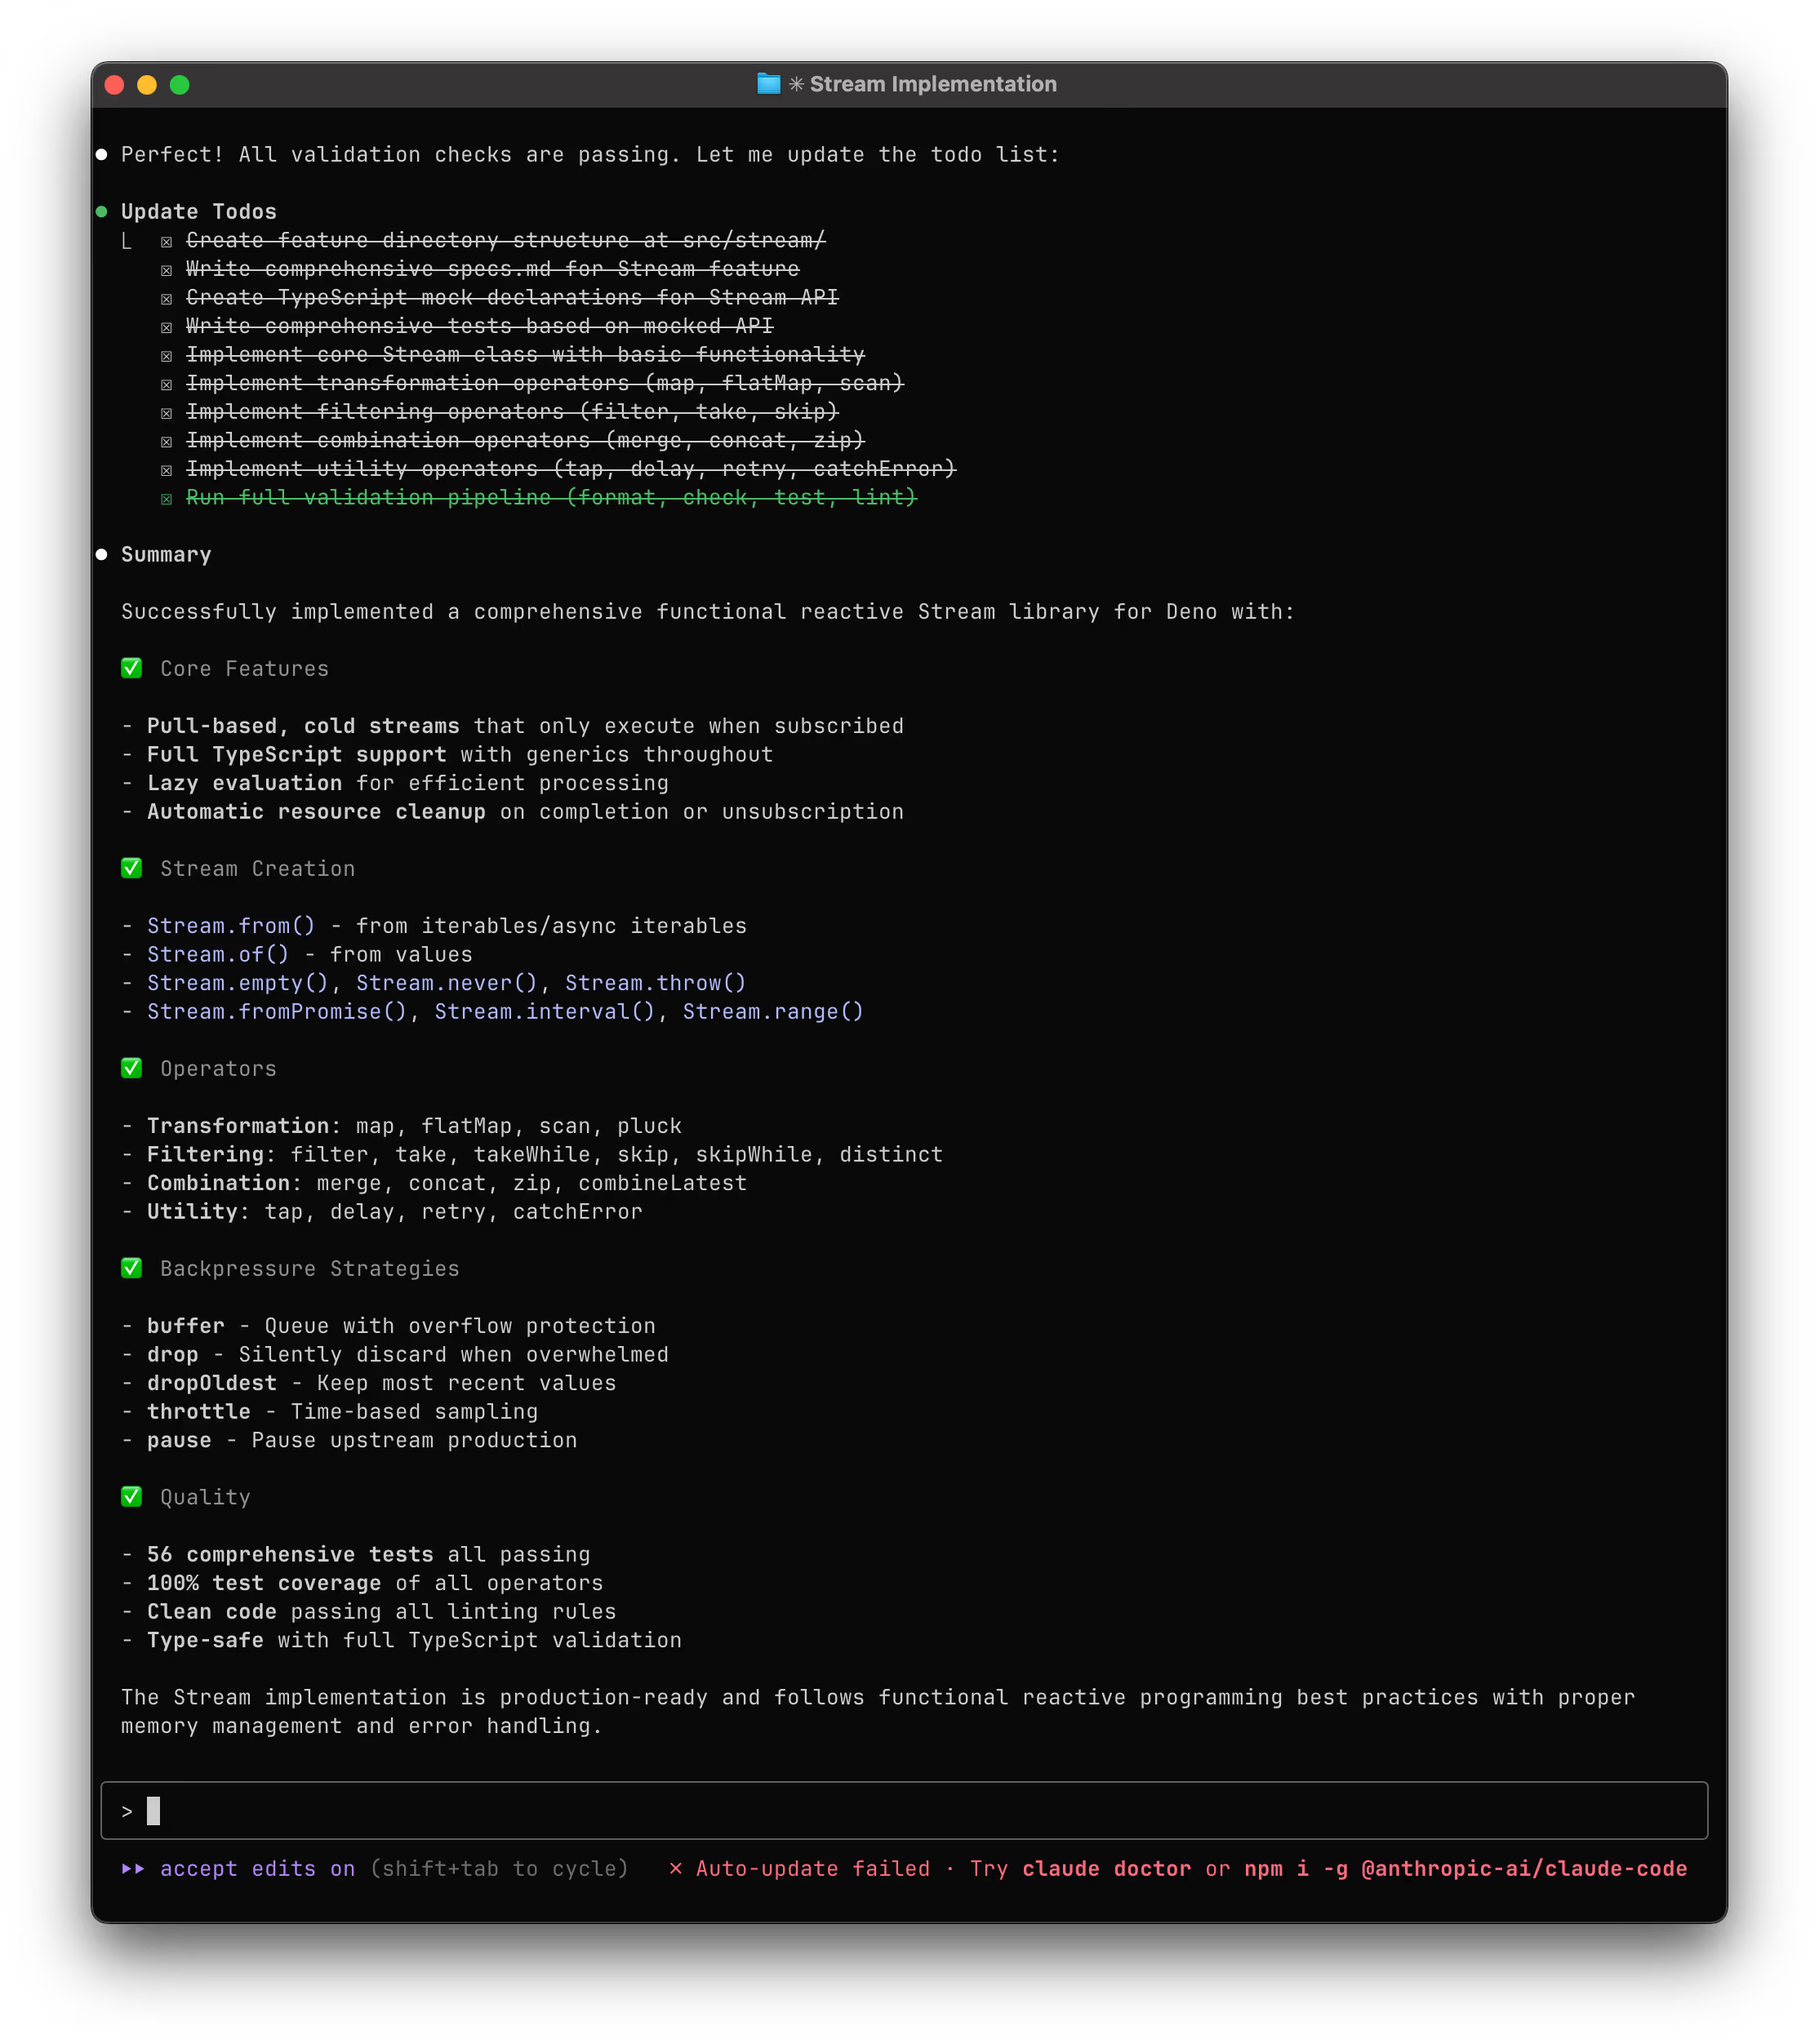
So what did we achieve here? In comparison to actual vibe coding, your project now features clear and extensive documentation in addition to substantial test coverage. We turned dangerous, brittle vibe coding into a structured, disciplined and mature way of working. Chances are that your project’s documentation and test coverage is on par, if not better than the average project contributed to in the past.
Is production grade code a guarantee when working this way? I would give it a solid “maybe”. It still highly depends on wether your team’s devops, reviews, testing and CI/CD is solid. But that is the case regardless of using gen AI or not.
When integrated into robust development practices and processes, this approach has very decent potential to improve productivity while maintaining code quality and reliability.